A Few Thoughts, Now We’re at the End

This past year has taken me on both an educational and spiritual journey. Through this I gained the ability to grasp a greater understanding of who I am as a designer. I feel at this final stage it is extremely valuable to reflect on the experiences gained. ­

I knew from the offset that I wanted to create something that allowed the user to be completely immersed into a meditative experience. I have always loved products and art pieces that create a synesthetic state in the user and wanted to create a product that had this underlying theme. I found myself one day early in the year making tea, the same way as always, with my self-constructed tea set.  While I was drinking I was struck with a sudden realisation, why do I make tea this way? Why do I drink tea every evening after my meal? It was because of the state of relaxation it evoked. From this point on I knew I wanted to work with tea.

I began by studying tea as an art form and spiritual way of life (Taoism) alongside field research into the current tea perception in our western world. These were both extremely valuable approaches and from them I was able to strike an effective balance in a design sense. From researching into the art form of tea in ancient China and Japan I continually gained a deeper respect for the project and what I was trying to create with it. The research also allowed me to understand what form of design I would like to do in my future career. The Zen state of mind that is present in parallel to Taoism speaks of glory in the moment and about enjoying the simple experiences of life. From this I now know that I would like to design thought provoking products that allow for the amplification of an experience.

One of the most significant design changes that I made through the year came from, what I believe, to be the result of getting to close to your design, (an inevitable reaction when working on something this long). In the early stages of my design I was trying to implement almost all aspects of the Chinese Gongfu Ceremony (a traditional tea ceremony). This appealed directly to me because I personally would love to learn how to correctly complete the detailed process. However I understand now, by conducting field research, that most people will purely perceive my design as over complicated and unnecessary. I have since created a simplified version of the process and it can be found as the core of my final design.

I also had the opportunity to learn and apply new crafting techniques. I would call myself a design craftsman due to my hands on approach to my design process. Before this project I had never worked in any form of casting or ceramic, a vital part of any craftsman’s arsenal.  Through the “Essence of Tea” I was able to develop both of their skills and apply them to my final design. I am extremely pleased that I was able to obtain these skill sets before leaving university. I also had the chance to deepen my understanding of fine wood craft, through the construction of the “Essence of Tea” oak table. Many of the final design decisions I made this year came from gaining a deeper understanding of how materials react to particular subjected environments and working techniques.

It was very important to me that all the design decisions that I made through the design process accurately represented the core values of the product. This can be seen very clearly in the material choices. The product is constructed from 100% natural materials and all natural product finishes are used. The products visual language promotes the users experience by being mainly constructed from red earthenware clay and American white oak. Both of these key materials are even finished to appear as natural as possible by leaving the exterior of the clay unglazed and finishing the oak with Chinese tung nut oil. The hand crafted approach to the build of the “Essence of Tea” has given it a valued personal character and will develop its own personality as it is used more and more.

The project has opened my eyes to a completely new way of thinking, and I can safely say it’s shaped the way I now look at the world of design. Because of this point I consider this project to be a success and a great way to end my university experience.

100 Words, 1 Great Image and 1 Minute Video

Tea is the most popular beverage in the world but the rituals and passion behind its art have been lost along the way. In the western world most people drink tea for convenience. They want it quick and drink it fast; the enjoyment of the brewing process has been lost.  

 ‘The Essence of Tea’ is a collection of handmade pieces that allow the user to immerse themselves into the traditional brewing process, whilst enabling them to take a step back from their busy lives.

LFISCHLER-6630 (finlay edit)

Filming the One Minute Video

For our final hand-in we have been asked to create a one minute video. As the “Essence of Tea” is all about an interaction I have decided to make my video about this interaction. I was fortunate enough to be accepted on to a film crew last year as the production designer and through that experience gained friends in the film making industry. I decided to call upon a favour from these friends and recruit them onto my one minute film crew, a helping hand I am, very much grateful for. The team consisted of:

Myself (Finlay Page):  Director

Alan McIllrath: Camera/Cinematographer

Robbie Gray: Gaffer/Focus Puller

Petr Chutny: Actor/Assistant Director

Leanne Fischler: Location/Art Director

The film process began my researching current product videos that show an interaction. I found that the ones I liked best were actually videos that show you a process in fine detail, aspects of this style can be seen through my video. After I knew what sort of video I wanted it was time to actually film it. So first think I did was hiring out from the university AV workshop some equipment. The equipment that was hired out consisted of the following items:

Sound Kit: Zoom H4n Recorder, Sennheiser Gun Mic, Sony ECM-66B, a Floor Mic Stand

Lighting Kit: Arrilite 2000 (Blondes), Arrilite 650 Fresnel, Arrilite 300 Fresnel, Trace Frames x2, Dimmer x2

Using this equipment we were able to replicate any kind of lighting and record all the detailed sound that were needed to pout across an accurate “essence of Tea” experience on film.

Photo 21-04-2014 14 24 34Photo 21-04-2014 14 54 19

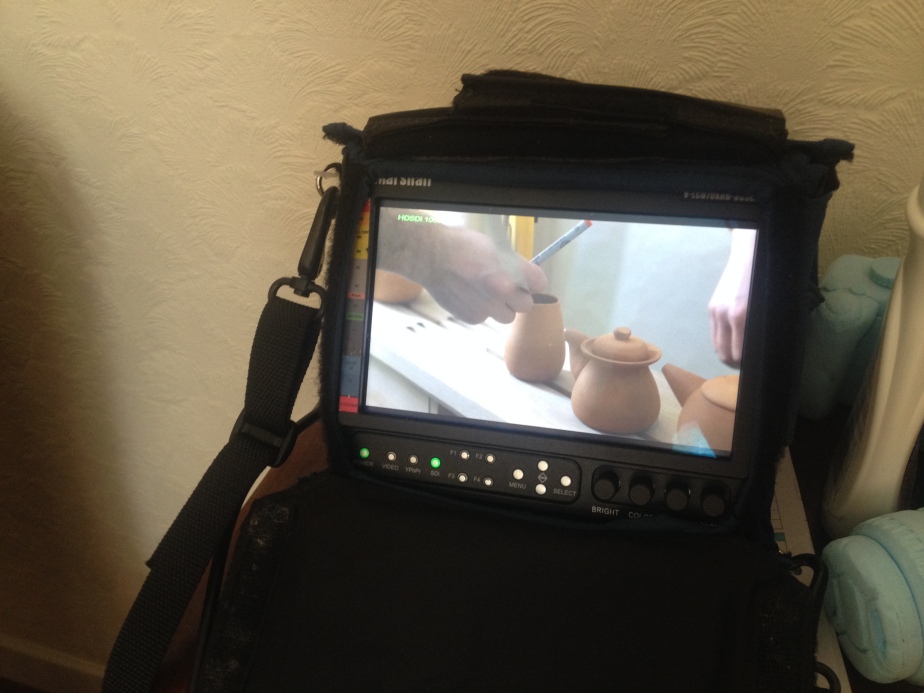
The filming involved us running through the whole “Essence of Tea” process for every different shot until we were happy with its quality. This meant for a large amount of filming data but also gave me absolute freedom in editing. Below you can see images of Robbie marking the manual stops for each shot as he acted as the focus puller, and the directors monitor. The directors monitor allowed me to see what the camera was capturing without looking into the actual camera itself. To allow for a more fluid video Robbie, as the focus puller, had to focus the camera for every camera angle change manually.

Photo 21-04-2014 14 17 06 Photo 21-04-2014 14 16 34

Once the filming was complete I commenced editing. This was my first experience of editing a film and I’m happy to say it went smoothly. Due to the fact that I had lots of footage of the say scenario, only captured at a different angle or frame, meant that I could chop and change to emphasis on specific artefacts and movements present in the products use. I opted to not include music in the final cut, I felt that the sound of the natural rhythm of the process was music enough. It also allowed for a more relaxed piece, which I believe to be quite valid.

Below you can see the final video:

Final Build

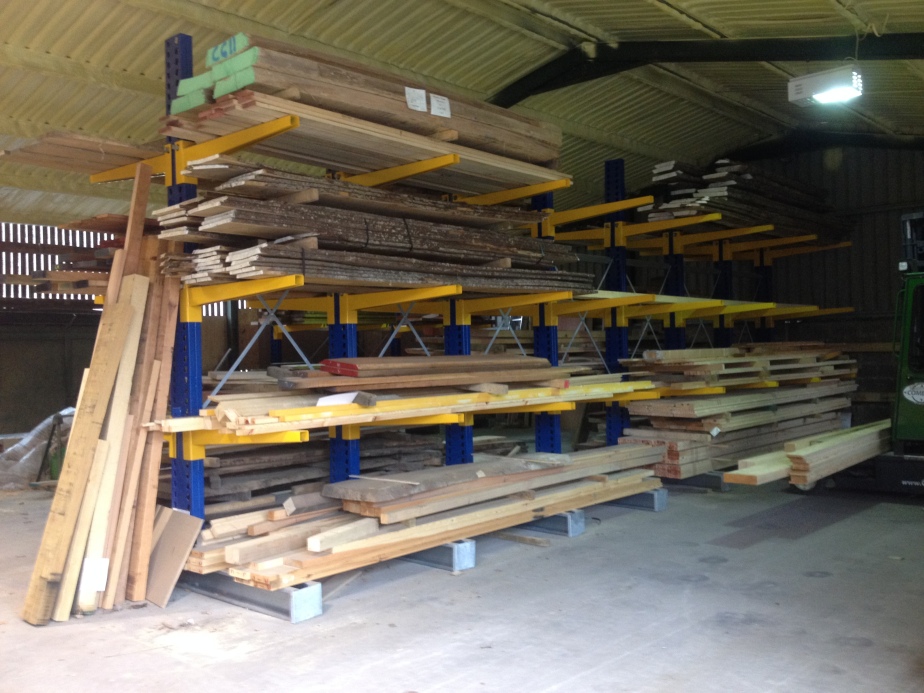
Now we are coming to the end of the year and the much anticipated final hand-in, the final product build must commence. I started by first of all buying the materials I will be requiring. I visit to Brodie’s at the Inver sawmill was needed and I purchased a large amount of American White Oak.  I bought the oak quite early so I could allow it time to settle in the workshop for two weeks.

Photo 20-03-2014 13 04 31 Photo 07-04-2014 17 15 40

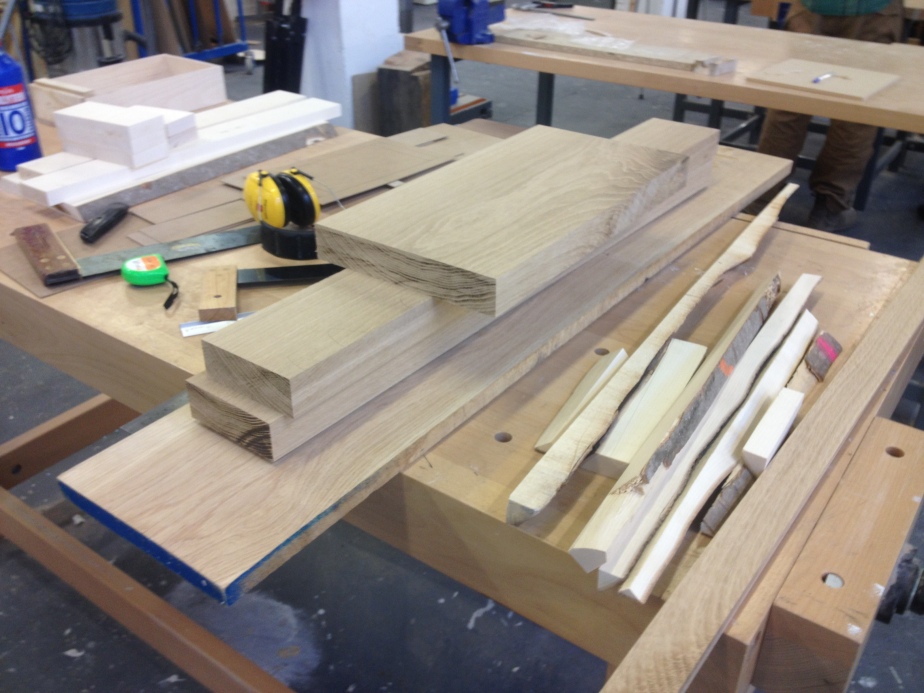
After the two week wait for the wood to settle I began by planeing the wood to the correct thickness (40mm) this also allowed for a smooth surface finish to take effect. Next with help from the university technicians I cut all the component parts to size and could begin to apply the finer details of the work.

Photo 08-04-2014 17 04 11

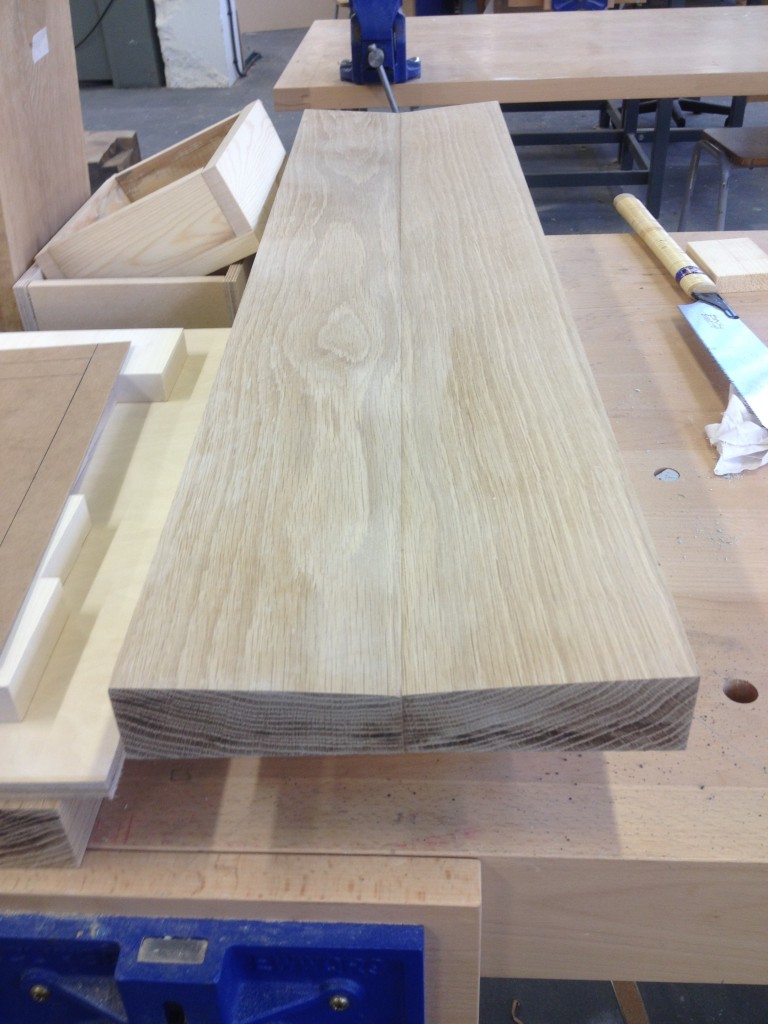
My intention for the angled top face of the table was to first cut the solid piece of two inch oak in half, plane the angle out and then biscuit join the two pieces back together again. In the images below this process can be seen. I applied detailed finishing techniques to hide the split line and can safely say that the end result allowed for an almost unnoticeable divide in the wood.

Photo 09-04-2014 11 23 42 Photo 10-04-2014 16 18 20

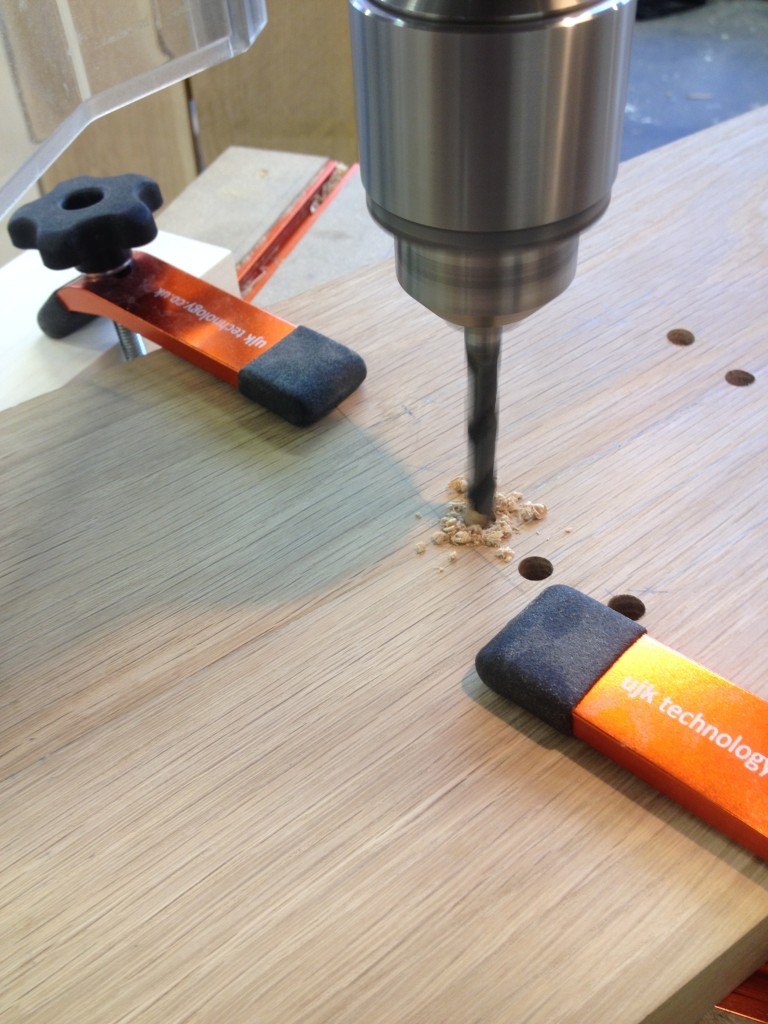
Next step was to remove the materiel in place for the drainage sink, present in the far end of the table. From discussing this feature with the technicians we devised a way to achieve a crisp finish using many different techniques. The first part of this process was to drill out the end points of the slots using the pillar drill. As the wood was two inches think at some points it was imperative that the holes were at an absolute angle to the part.

Photo 14-04-2014 12 24 07

Next I used a jigsaw to remove some of the material within the sink slots. The ultimate goal was to use the router to remove the end material from the sink to create a clean cut finish. As the material was very think it is good practice to try and remove as much as possible without cutting past the finish line. This means that the router only has to remove a small amount and therefor reduce the chance of tearing the wood.


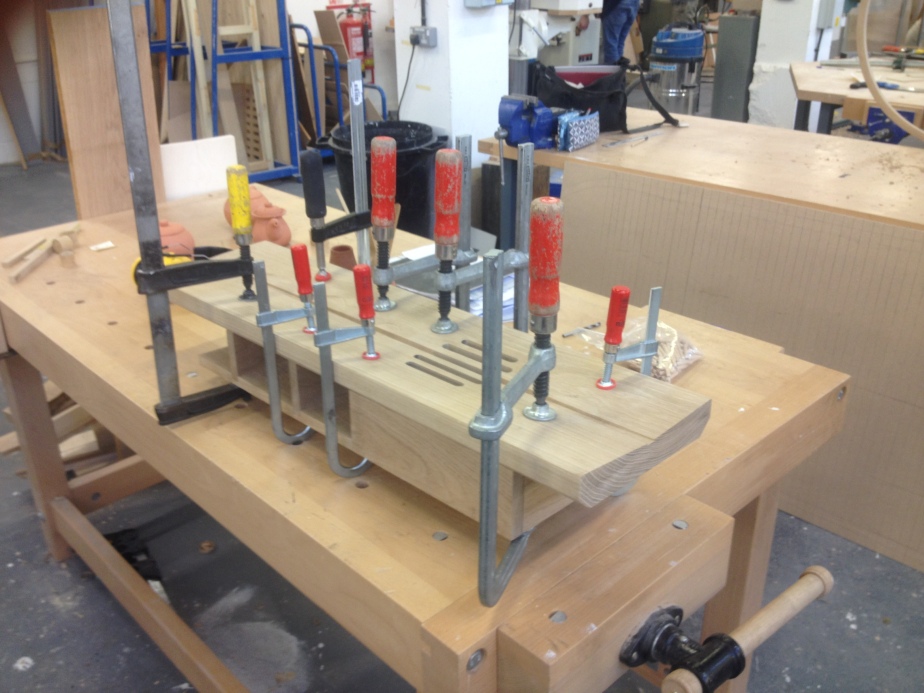
After I had removed some material using the jigsaw, leaving a 1 mm gap for the router to remover, we moved on to using the router. We decided that it would be valuable to remove the material from the center channel first. To do this I build a small jig that lifted the table top up at one end, this allowed for the router to remove an angled channel. The angular channel is needed so the water will flow into the drainage sink rather than stay at rest. Once the central channel had been complete we moved on to completing the drainage sink slots. As the slots need to be cut to a uniform shape and size, I created a jig that would stop the cutter when it had cut far enough (the jig can be seen below).

Photo 17-04-2014 12 40 26 Photo 17-04-2014 11 45 11 Photo 17-04-2014 12 31 45

After the linier routing had been complete I moved on to cutting out the flat surfaces for the clay ware to sit on. To achieve this feature I needed to develop and create yet another form of jig. This one however involved cutting a hole out of a piece of MDF in relation to the size of the flat surface I would like to achieve (jig can be seen below). I then clamped the jig in the location I wished the feature to be on the table top. Using a hand router with a bull nose bearing router tip, (the tip has a small bearing on its base which allows it to roll along a surface, in this case the circular jig I created). The hand router in then moved around the jig to create the desired feature. Once the router has done its job the part needed a small amount of finishing, so using chisel I scraped it to a smooth finish.

Photo 17-04-2014 17 01 02 Photo 18-04-2014 10 22 11

After the hand routeing was complete I finished the table top by planeing two angles on the bottom face. These angles added an attractive feature to the piece.

Photo 18-04-2014 14 25 53

Now that the table top was almost complete I moved on to making the base. The base is made op of the utensil shelves the table top supports and the drainage drawer. The base is designed to hold the tea utensils, water sink as well as support the heavy two inch table top; this meant that the part needed to be quite solid as well as stable. Each individual piece of the base was designed to be slotted into each other to maintain a rigid and supportive structure. This was achieved on both the routing and milling machine. Once the component parts were completed they were slotted together and glues in place.


Photo 15-04-2014 15 56 24 Photo 17-04-2014 10 52 49

The next task with to attach the table top and the base together. It was decided that the best way to do this was to dowel them together. As doweling two pieces together is a process that calls for absolute accuracy I decided to build a jig. This jig would have the 8 holes needed for doweling already drilled out and would then act as a template for the table top and base. The jig would be paced on top of the base; the holes would then be drilled out using the template jig as a guide the same would then be done for the table top. This resulted in a perfect fit and there was luckily no complication in the joining process.

Photo 18-04-2014 16 32 26 Photo 18-04-2014 16 54 00

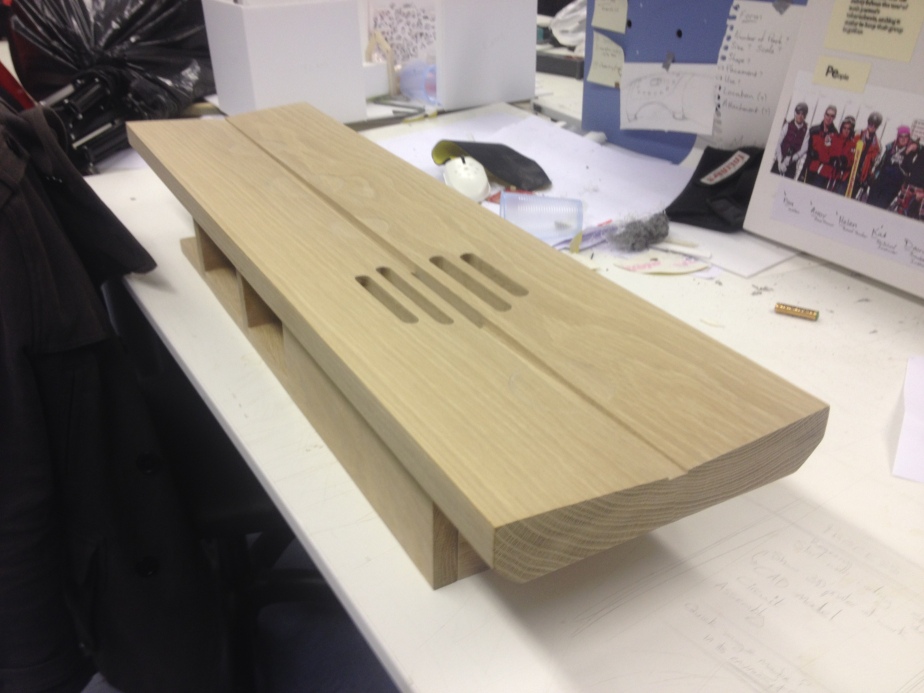
After the parts had been joined together the build was complete, the finished piece can be seen below. I must now prepare the part for its finishing coat and It will them be ready to present at my Viva.

Photo 25-04-2014 20 10 55

Build Development and Practice

Now that I have my table design and materials, the only thing left to do it build it.  I first started by asking one of the wood workers in the university workshop to assist me in resolving the steps that I should take in this build. With their help we were quickly able to devise a first iteration of the process.

Photo 07-04-2014 17 32 15 Photo 07-04-2014 17 32 20 Photo 07-04-2014 17 32 28

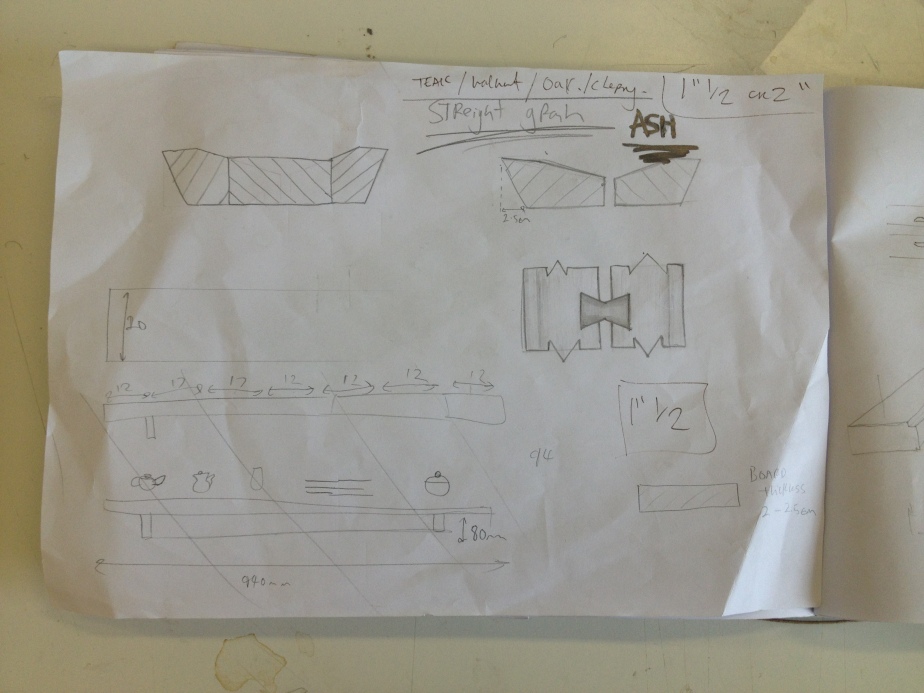
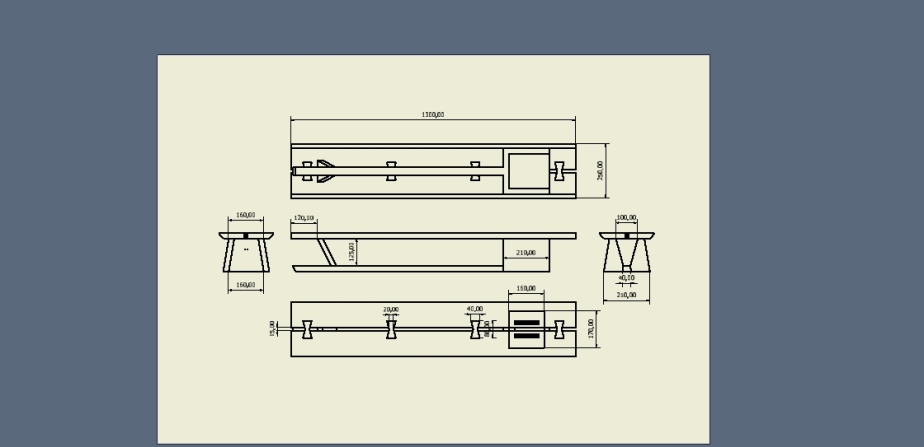
I had at this stage slightly altered the design of the table but from looking at the image below will give you a basic understanding of what the final will look like.

table (dimentioned) table colored

I first started with a small sectioned piece so I could practice chiselling out the central channel.

Photo 26-03-2014 11 45 33

It was quickly realised that chiselling was not the best option and that another method must be used. The chiselling technique left an untidy finish that would not allow for optimum water flow and so a machined finish was called for.  The final process is as follows:

  • Plane material to a flat smooth finish, using the machine planer.
  • Cut the table top in half lengthwise (to allow for angular planeing).
  • Hand plane each half of the table top to an angular finish.
  • Biscuit the two half together again to form a V channel.
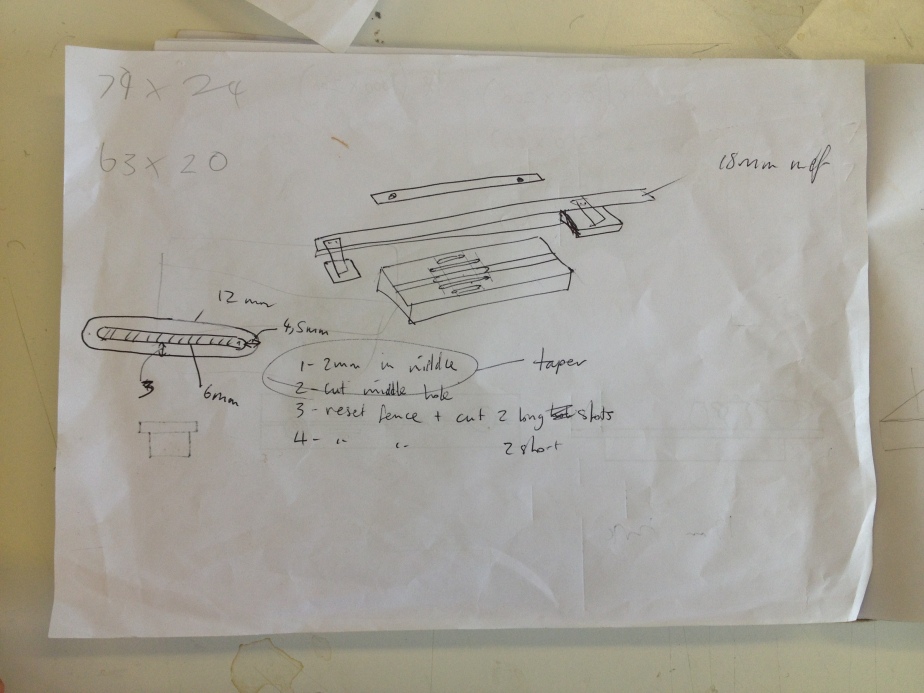
  • Drill out each end of the sink grill using the pillar drill, leaving a two millimetre gap from the absolute edge.
  • Jigsaw out the other material of the sink grill, leaving a two millimetre gap from the absolute edge.
  • Route out the centre channel all the way along at 2 mm depth.
  • Route out the tapers of the centre channel, using the custom made jig.
  • Route out the remainder of the material from the grill sink holes, starting with the centre hole due to the already set up fence.
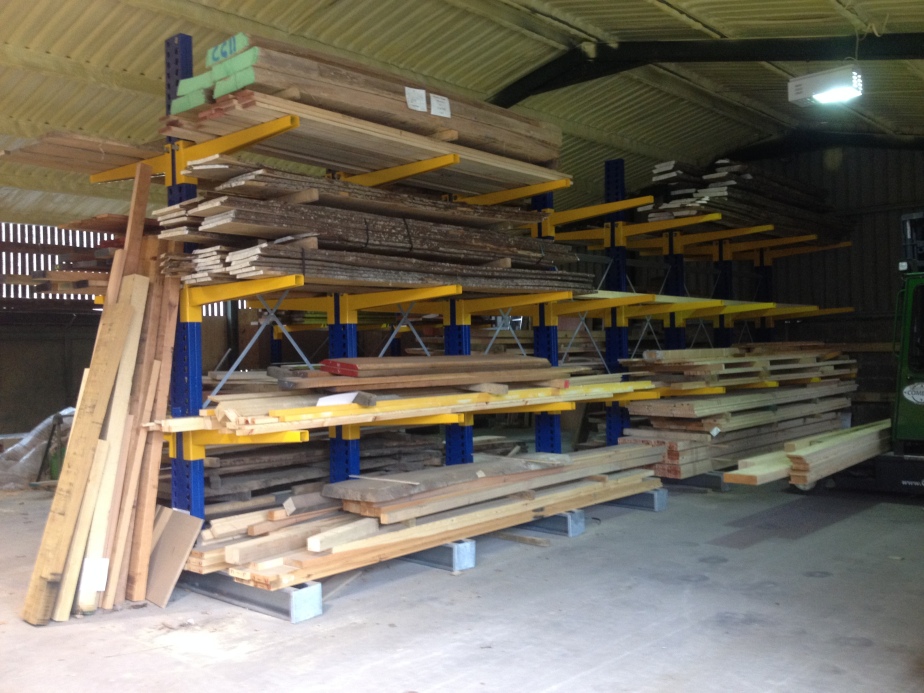
Photo 28-03-2014 11 22 45 (1) Photo 27-03-2014 11 35 15 (1) Photo 27-03-2014 11 32 04 (1)

Following this nine step plan will allow me to create the unfinished table top of my design. The base and the support leg will require little if any machining. The base consists of the construction of one box, plus drawer, and a solid wood leg. I have prototyped this and am confident in its operation and build.

I followed all of the above steps using a piece of pine, so to physically equip myself with a understanding of how to construct my final. I then used this finished prototype to photograph my project for the DJCAD Degree Show brochure, image seen below.

Finlay Page

Now I know how to construct my final piece I will now go ahead and create the sycamore and oak tables. After I have completed both the builds I will decide on the most appropriate piece and use that in my final deliverable.

Brodies Visit and Wood Selection

Now that I know what I wish to build, I must go and buy the materials, but before I could do that I needed to get some advice of what wood would best suit my product. I began by asking the wood workers within the university workshop what they would recommend. I was informed that the main issues that I would encounter would be mostly due to the fact that the wood would become in contact with water on a regular basis. To stop the wood warping and becoming damp I needed a dense preferably straight grained wood. I was also looking for a wood that would complement the red tones of the red earthenware that I am using to create my clay pots. I began to search online for what woods would be the best options; there were many that had the right aesthetics and density however I was also balancing cost. I decided to contact the local sawmill at Inver, Brodie’s, and ask about their selection. From our chat I was told that there was a wide selection that fitted my specification, and so a few days later I visited them to see what I could find.


The stock that they had was vast, and called for a lot of inspection. Due to the fact that I was after I very precise piece of wood I needed to make Sure that there was no errors or discrepancy’s.

Photo 20-03-2014 13 04 48 (1) Photo 20-03-2014 13 04 38 (1) Photo 20-03-2014 13 04 31 (1)

After I lot of looking around and recommendations I left with a large piece of sycamore, some unidentified red wood and two pieces of heavy American oak. This selection gives me the ability to test what will work best and prototype my concept. The sycamore id a very light coloured wood, almost white and will allow the clay ware to stand out. The American oak will look very rich and allow the rich red tones of the clay pots to be complimented.

Photo 20-03-2014 13 05 10 (1)

Photo 07-04-2014 17 15 40

The next stage in my projects development involved testing the build of the table and learning how to best create the final piece.

MK2 Prototype

Now that I know what I want both my pots and table to look like, it’s time to prototype it all together. I started by creating all the clay work, as it would take the longest to complete and involved a lot of waiting around. To start the clay work I fist had to fill my already made casts full of clay slip.

Photo 10-03-2014 11 31 36 Photo 10-03-2014 11 08 55

This slip was then left for around 20 minutes to form a 3mm all thickness. It was then poured away ready to use another day. The lay then takes three hours to dry enough to remove the mould and handle. While I was waiting on the clay drying I had time to work on the other aspects of the prototype. After the three hours were up I preceded to remove any split lines or imperfections that had been formed by the cast. The final part of the process is joining the components of the more complex pieces. Both the tea pot and tea server require this extra attention. The joining technique involves scoring and wetting the surface of the clay whilst it is of a leather hard consistency. After a 2 day wait the pots are ready to fire, the kiln is filled and another 4 days later I had my fired pots.
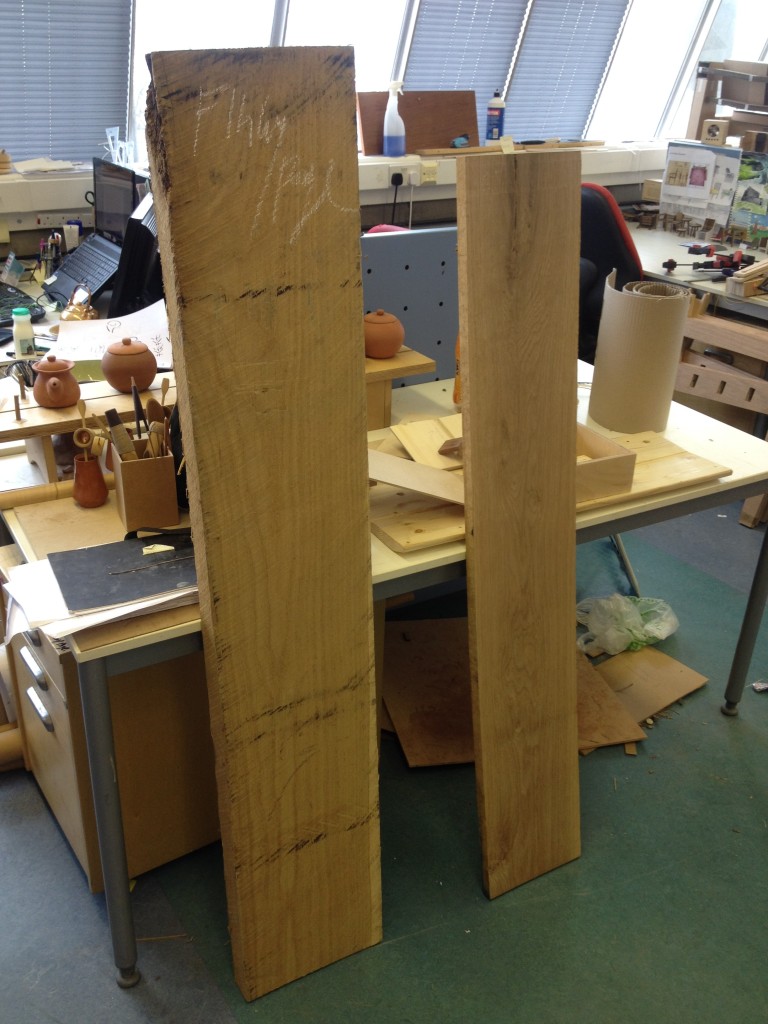
Photo 28-03-2014 16 28 57 (1)

The next and final step of the clay work element was to glaze the pieces. I decided early on that I wanted to keep the exterior of the pots untouched and leave them with their Stoney texture. The glaze is quickly applied and then a final firing will produce the final pieces.


The other side of the prototype is that of the table design. After quickly mocking up a design on CAD I began to create a physical form using plywood and MDF. I chose to use these materials due to their workability and sturdiness.  The first step of the build involved cutting wood to the appropriate sizes and detailing them as necessary. A plunge saw was used to create the drain detail on the top face.

Photo 14-03-2014 12 12 29 Photo 14-03-2014 16 40 24 (1)

I then used the milling machine to mill out a groove along the top face. This groove added both an attractive aesthetic feature as well as a functional channel for all spillage to be drained. The final part was to attach the basin, to hold all spillage, and the table leg.  With the addition of my previously made utensils I was able to bring it all together to create the prototype.

Photo 03-04-2014 18 18 55

George Nakashima and Table design

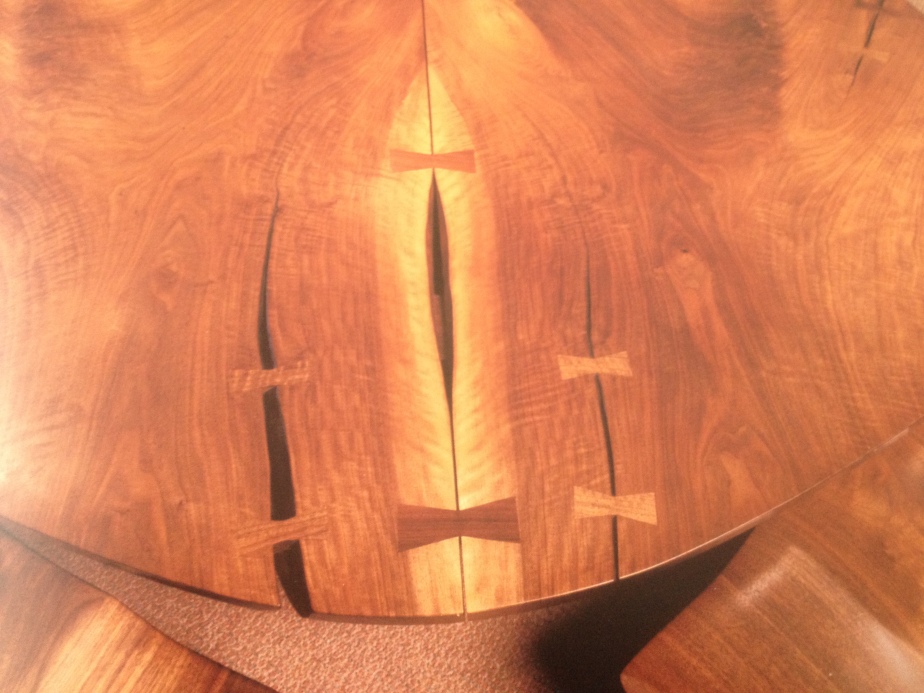
Now that I have my final tea set design I need to design a tea table to present it on. I would like to incorporate the East Asian design language into the table and so I researched relevant work. I came across George Nakashima, a Japanese furniture maker and designer. I was able to find the book “Nature, Form and Spirit, The Life and Legacy of George Nakashima” using this I learned about his style and references. The book also allowed me to observe many different examples of his work. Using these examples I developed many different design iterations.

Photo 17-03-2014 15 22 15 (1) Photo 17-03-2014 15 22 38 (1) Photo 17-03-2014 15 24 22 Photo 17-03-2014 15 25 57

Using a combination of hand sketches and Autodesk Inventor (CAD) I was able to visualise my designs and start to construct physical prototypes. I was able to develop an understand how to build the table by talking with the university technicians and playing around with concepts in CAD.

table (dimentioned) table colored

I intend to now work in the workshop on building my design for my MK2 presentation.

Metal Work: Tea Strainer

For my final product I wanted to design and make a tea strainer. Seeking inspiration from tea strainer designs online I quickly developed a 3D CAD model of my chosen design (follow links below for PDFs).

Tea Strainer Drawing (dimentioned)

Tea Strainer and holder coloured pdf

I took these drawings to the jewellery department top ask about the optimum process to achieve the desired result. I was informant that the work would take roughly one and a half weeks to complete if I was to make it myself with supervision. I was also offered to commission one of the in-house designers to craft the piece; this option would take around 3 days whenever the designer was available. I didn’t have the ability to commit a week and a half to the creation of this piece and so I needed to think of some other method. I decide to change my angle slightly and make a bamboo tea strainer, using my wood crafting skills.


Using the bamboo method I would have the ability to create the bulk of the piece, however I would still need a mesh or holed part to catch the tea. I decide that I would like to try and make this part out of metal. Doing this would take roughly half a day due to the relative simplicity of the part. Below I will describe the process I underwent to produce the final parts seen below.

Photo 07-03-2014 17 16 25

First things first, I needed some metal. I decide to use copper because it is relatively easy to work and its colour is in keeping with my design language. The copper was cut into manageable squares and the circles scratched on. Next the holes were neatly marked, so as to know where to drill them out. After the holes were drilled out, using a small pillar drill, we decided how to produce the depth in the parts. It was decide that the oval shape would be fly-pressed and the two circular ones would be hammered out.


Before the fly-press could be used we needed to soften the metal, this Is achieved by intruding a hot flame to the metal in the form of a blow torch (see below)

Photo 07-03-2014 15 43 05

After the heating the metal is sharply cooled in the sink.

Photo 07-03-2014 15 43 09

The metal is finally placed in the pickeler to remove the black sooty residue left by the flame.

Photo 07-03-2014 15 43 14

Once all the heat treating had been completed we moved into the fly-press.  The fly-press uses a pressured arm to physically push a shape out of the metal. This firstly requires the user to create a mould. I created  three mould (26x26mm, 28x28mm and 27x30mm) I did this with the intention of fly-pressing all three is the pieces. As it turns out the circular parts can be hammered instead, a much easier process with the ability to make the depth larger. The three moulds were laser cut out of 5 mm acrylic, a material that is strong enough to withstand the pressures of the fly-press. The fly-press process involves placing your small sheet of metal over the mould and then place a lump of blue tack upon it. The blue tack will be pushed down into the cavity allowing for a uniform depth. Once the fly-press process had been completed all three sheets of copper (two of which have not yet been formed) must be cut out using a very fine jewellery saw.

Photo 10-03-2014 18 43 01


Photo 07-03-2014 15 53 38Photo 07-03-2014 15 43 50Photo 07-03-2014 16 42 33

Photo 07-03-2014 16 47 34

After the three circles had been cut out they had to be filed down to the exact shape that was desired. After this process was completed I was left with one piece almost completed and two flat parts still needing hammered out. The hammering process involves using a metal block with cavities. Once I had determined what depth I wanted I simply placed the circular copper piece into the cavity and bashed it with a hammer that equalled the shape of the cavity. This resulted in two piece that were of uniform size.

Photo 07-03-2014 15 53 52Photo 07-03-2014 16 53 05

Photo 07-03-2014 17 05 11

Now that all three pieces had been shaped it was time to polish them. I use the polishing machine to get the texture and finish that I desired. After this I was left with three well finished copper parts. I intend to using there copper parts within my tea strained design, I will post my completed iterations soon.